The panic hit at 11 PM on a Sunday.
I’d spent three weeks researching sustainable architecture for a client presentation. I’d read dozens of articles, watched conference talks, saved case studies, bookmarked tools, and collected examples. I felt informed, prepared, ready.
Then I sat down to actually create the presentation and realized I couldn’t find half of what I’d saved. That brilliant article about biomimicry in building design? No idea where it went. The case study with the exact cost breakdown I needed? Gone. The tool comparison I’d spent an hour reading? Vanished into the void.
I had 73 browser tabs open across three windows. Bookmarks scattered across folders named “Architecture,” “Sustainability,” “Client Work,” and “Research Temp.” Notes in Google Docs, Apple Notes, and scribbled on paper. Links texted to myself. A few things saved in Pocket that I’d completely forgotten about.
I’d done the research. I just couldn’t access it when it mattered.
Sound familiar? Research overwhelm isn’t about not finding information. The internet has plenty of that. It’s about drowning in what you’ve found and losing the signal in the noise.
The problem isn’t that we’re bad at research. We’re bad at organizing it in ways our brains can actually retrieve. We save everything “just in case” without any thought to future-us who needs to actually use it.
Here’s what nobody tells you about research organization: the system matters more than the volume. You don’t need to read more or save more. You need to organize what you have in a way that makes it accessible when you need it.
Let me show you how.
Why Traditional Research Organization Fails#
Before we talk about what works, let’s understand why most research systems fall apart.
The Folder Trap#
Most people organize research like they organize files: hierarchical folders. You create a folder for the main topic, subfolders for themes, maybe sub-subfolders for specific angles.
This seems logical until you need to find something that could fit in three different places. Is that article about sustainable materials in “Architecture” or “Environment” or “Materials Science”? You picked one folder months ago. Current-you has no idea which one past-you chose.
Folders force you to make premature organizational decisions before you understand what you’re researching. They assume you’ll remember your own logic weeks later. You won’t.
The Everything-in-One-Place Myth#
Some people go the opposite direction: dump everything into one giant collection and rely on search. This works until you have 200+ items and search returns 40 results that all seem relevant.
Search requires you to remember keywords. Research is often about discovering connections you didn’t know to search for. Browsing matters as much as searching, and browsing a giant unsorted pile is miserable.
The Over-Organization Paralysis#
Then there are the people (hi, it’s me) who spend more time perfecting their organization system than actually using it. Color-coded tags, elaborate naming conventions, cross-referenced notes, metadata fields for everything.
This feels productive but isn’t. Every time you save something, you face 10 decisions about how to categorize it. The friction becomes so high that you either stop organizing or stop saving things. Neither helps you do better research.
The Tool-Switching Problem#
You watch a YouTube video on your phone and want to save it. But your research system lives in Notion on your laptop. So you text yourself the link to deal with later. Later never comes, or the link gets buried in other messages.
Research happens across devices and contexts. Any system that only works in one place or requires elaborate workflows to add things will fail.
The common thread in all these failures? They optimize for initial organization instead of eventual retrieval. They focus on where things go instead of how you’ll find them later.
The Core Principles of Research Organization That Actually Work#
After years of trying every system imaginable, I’ve landed on principles that work regardless of the tool you use.
Visual Memory Beats Text Memory#
Your brain is incredibly good at remembering images and spatial relationships. It’s much worse at remembering text in lists.
Studies show we remember 80% of what we see versus only 20% of what we read. Yet most research systems present everything as text lists.
Good research organization uses visual cues: preview images, color coding, spatial layouts. When you’re looking for that article about green roofs, you remember “it had a photo of a building covered in plants” way faster than you remember what folder you filed it under.
Collections Beat Hierarchies#
Instead of forcing everything into a tree structure, organize research into collections by theme, project, or question.
The key insight: one piece of research can live in multiple collections without duplication. That article about solar panels might be relevant to your sustainable architecture project AND your renewable energy research AND your cost analysis collection.
Hierarchies force you to choose. Collections let you be multidimensional.
Context Now Saves Time Later#
When you save something, spending 30 seconds adding context saves 10 minutes searching later.
Not the full text of the article. Just: why did you save this? What’s the key insight? How does it relate to your research question?
These notes are breadcrumbs for future-you. Without them, you’ll spend ages re-reading things to figure out why they mattered.
Friction Kills Systems#
The easier it is to add something to your research system, the more likely you’ll actually use it. Every extra step or decision point increases the chance you’ll just close the tab and lose it forever.
Good systems make saving frictionless and organization optional but encouraged. Perfect categorization up front isn’t necessary. Rough organization with easy refinement later works better.
Regular Synthesis Beats Perfect Organization#
You don’t need a perfectly organized research library. You need to regularly engage with what you’ve collected.
Set aside time weekly to browse your research, make connections, and synthesize insights. This active engagement matters more than having a beautiful filing system you never look at.
Step 1: Choose the Right Tool for Research Organization#
Different research needs different tools. Here’s how to match your situation to a solution.
For Visual Research (Design, Architecture, Creative Work)#
If you’re collecting inspiration, examples, or anything where the visual matters, you need a tool built around images.
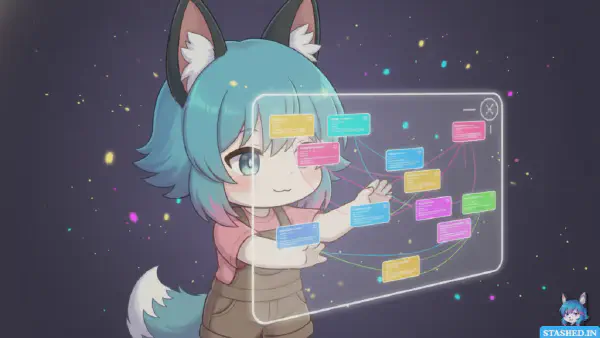
This is exactly why I built Stashed.in. Traditional bookmark folders are painful for visual research. You can’t browse effectively when everything is just text links.
On Stashed.in, you create stashes (think Pinterest boards but for any type of link) with header images. Each saved link shows a preview card. When you open your “Sustainable Architecture Examples” stash, you see a visual grid where that green roof building is immediately recognizable.
The visual organization matches how your brain works. You’re not searching through lists; you’re browsing a curated collection where visual memory does the heavy lifting.
For Academic Research (Papers, Citations, Literature Reviews)#
If you’re dealing with academic papers and need citation management, use Zotero or Mendeley. They’re purpose-built for academic workflows with bibliography generation, PDF annotation, and citation tracking.
Pair this with a simpler tool for web articles and supplementary sources. Zotero for papers, something like Stashed.in or Raindrop for everything else.
For Long-Form Note-Taking and Synthesis#
If your research involves extensive note-taking, connecting ideas across sources, and building arguments, use Notion or Obsidian.
Create a database for sources with fields for title, URL, key insights, and related concepts. Link sources to project pages or concept notes. The relational aspect helps you see patterns.
The downside: this requires more setup and maintenance. Only worth it if synthesis and connection-building are core to your work.
For Quick Reference and Simple Organization#
If you just need to collect resources without heavy organization, Pocket or Raindrop.io work well. Clean interfaces, good search, tagging support, and minimal friction.
Best for people who save moderate amounts and primarily use search rather than browsing to refind things.
Step 2: Build Your Initial Organization Structure#
Don’t start by importing everything you’ve ever saved. Start fresh with an intentional structure.
Identify Your Research Themes#
Look at what you’re actually researching right now and what you anticipate researching in the next few months. These become your initial collections.
For example, if you’re a UX designer, you might have:
- Interaction Design Patterns
- Accessibility Resources
- User Research Methods
- Visual Design Inspiration
- Tools and Software
- Case Studies
Aim for 5-10 broad collections to start. You can always create more specific ones later.
Create Collections with Clear Scope#
For each collection, write a 1-2 sentence description of what belongs there. This prevents scope creep where collections become dumping grounds.
Good: “Interaction Design Patterns: Reusable UI patterns for common problems like navigation, forms, and data visualization. Focus on examples with live demos or code.”
Bad: “Cool design stuff I like.”
The clear scope gives you criteria for future decisions about where things go.
Set Up Tags for Cross-Cutting Themes#
Collections organize by topic. Tags organize by other attributes that cut across topics.
Common useful tags:
- Type: article, video, tool, course, documentation
- Depth: beginner, advanced, reference
- Status: to-read, read, in-progress
- Quality: essential, useful, maybe
Don’t go overboard. 10-15 tags maximum, or you’ll never use them consistently.
Add Visual Distinction#
If your tool supports it, give each collection a distinctive header image or color. This helps with visual recognition when you’re scanning quickly.
On Stashed.in, I always choose header images that represent the theme clearly. My “Typography” stash has a header with beautiful letterforms. My “Productivity Tools” stash has a clean workspace image. Instant visual recognition.
Step 3: Develop a Capture Workflow That Actually Sticks#
Having a system is useless if you don’t consistently use it. Build a capture workflow that fits into your actual behavior.
Save Immediately with Minimal Friction#
When you find something worth saving, do it right then. Don’t leave tabs open “to organize later.” Later never comes, or you have 50 tabs and can’t remember why half of them are open.
The fastest workflows:
- Browser bookmarklet or button that opens a quick-add dialog
- Mobile share sheet integration for phone research
- Keyboard shortcut for power users
On Stashed.in, I keep the site open in a pinned tab. When I find something, I click “Add Link,” paste the URL, and pick a stash. Takes 10 seconds.
Add Just Enough Context#
When you save something, add a one-sentence note about why it’s interesting. Not a summary of the whole article. Just the hook that made you save it.
Examples:
- “Best explanation of closures I’ve seen, uses practical examples”
- “Color palette generator that actually creates accessible combinations”
- “Case study showing 40% conversion increase from simplified checkout”
This tiny bit of context makes a massive difference later. You’ll remember what made it valuable without re-reading everything.
Choose Collections Intuitively, Not Perfectly#
Don’t overthink which collection something belongs in. Go with your first instinct. If it could fit in two places, pick one and add a tag for the other theme.
Perfect categorization isn’t the goal. Good-enough categorization that happens consistently is better than perfect categorization you never do.
Batch Process If Needed#
If you’re in deep research mode and can’t stop to organize, save everything to an “Inbox” collection. Then spend 15 minutes at the end of your research session moving things to proper collections and adding context.
This two-step approach keeps research flow uninterrupted while ensuring everything gets organized.
Step 4: Make Your Research Discoverable#
Organization isn’t the goal. Findability is. Here’s how to ensure you can actually retrieve what you’ve saved.
Use Descriptive Titles#
Many sites have terrible page titles. “Article | Blog Name” or “Untitled Document” don’t help you six months later.
When you save something, edit the title to be descriptive. Instead of “10 Tips,” use “10 Tips for Accessible Form Design.” Future-you will thank you.
Tag Consistently#
Decide on your tagging vocabulary and stick to it. Is it “javascript” or “js”? “Tutorial” or “learning”? “accessibility” or “a11y”?
Inconsistent tags fragment your organization. Searching for “javascript” only finds half your JavaScript resources if the other half are tagged “js.”
Make a quick reference list of your standard tags. Sounds anal-retentive, but it prevents chaos.
Write Better Descriptions#
The description field is your future self’s best friend. Include:
- What the resource covers
- Why it’s useful or notable
- How you might use it
- Any caveats or limitations
“Comprehensive guide to CSS Grid with visual examples and browser support info. Good reference for layout projects. Doesn’t cover IE11 workarounds.”
That’s way more helpful than no description or a generic “Good article about CSS Grid.”
Use Visual Markers#
If your tool supports custom images or icons, use them strategically. Essential resources get a special marker. Things you need to revisit get a different one.
Visual markers let you scan a collection and immediately spot the most important items without reading every title.
Step 5: Review and Refine Regularly#
A research system isn’t set-and-forget. It needs regular maintenance to stay useful.
Weekly Quick Review (15 Minutes)#
Once a week, browse your recent additions:
- Move anything from “Inbox” to proper collections
- Add descriptions to things you saved quickly
- Delete obvious duplicates or low-value saves
- Identify any new collections you need
This light touch prevents chaos from accumulating.
Monthly Deep Review (1 Hour)#
Once a month, dig deeper:
- Browse each collection and remove outdated or irrelevant items
- Merge collections that have too much overlap
- Split collections that have become too broad
- Update descriptions and tags for better findability
This is also when you rediscover things you’d forgotten about. That article you saved three weeks ago is suddenly relevant to a current project.
Project-Based Synthesis#
When finishing a project, create a summary or “lessons learned” document that pulls together the best resources from your research.
This synthesis makes the research valuable beyond the immediate project. You’re building a knowledge base, not just a link collection.
Step 6: Share Your Research Strategically#
Research becomes more valuable when shared thoughtfully. Here’s how to do it without overwhelming people.
Create Curated Collections for Sharing#
Instead of sending someone 20 individual links, share a curated collection. This is where Stashed.in really shines.
When someone asks “how do I get started with accessibility?”, I don’t dump my entire 100+ link accessibility collection on them. I create a new stash called “Getting Started with Accessibility” with 10 carefully chosen resources and share that.
The collection has a description explaining the learning path, each link has context about what it covers, and there’s a logical progression.
Use Privacy Settings Strategically#
Not everything needs to be public. Stashed.in lets you:
- Keep research private (most of your work-in-progress)
- Make it public (building your professional brand)
- Password-protect it (sharing with specific colleagues or clients)
For client work, I create password-protected stashes with research and inspiration. The client can access it anytime, but it’s not publicly visible.
Build Your Professional Brand#
Public research collections demonstrate expertise. When you’re known as the person who maintains the best curated list of [your specialty], that builds credibility.
I have public stashes for topics I write about frequently. When I reference them in articles or conversations, people find them useful and my expertise becomes visible.
Make Collaboration Easy#
For team projects, shared collections beat emailing links back and forth. Everyone adds to the same collection, and everyone can see what’s been found.
This is especially powerful for:
- Competitive research (marketing teams)
- Technology evaluation (development teams)
- Design inspiration (creative teams)
- Industry monitoring (anyone staying current)
Common Research Organization Mistakes to Avoid#
After helping people organize their research for years, I’ve seen these mistakes repeatedly:
Saving Everything “Just In Case”#
Not everything deserves to be saved. Be selective. If you can easily Google it again or it’s not clearly relevant to your current/future needs, let it go.
A tight, curated collection of excellent resources beats a massive pile of everything you’ve ever encountered.
Creating Too Many Collections Too Soon#
Start with broad collections. Resist the urge to create hyper-specific ones before you know if you need them.
You don’t need separate collections for “React Hooks,” “React Performance,” “React Testing,” and “React Components.” Start with “React Resources” and split it later if it gets too big.
Ignoring the Maintenance Tax#
Every collection you create needs maintenance. Every tag you use needs consistency. Every organizational layer adds cognitive overhead.
Simpler systems that you actually use beat complex systems that you abandon after two weeks.
Not Adding Context at Save Time#
“I’ll remember why this is important” is a lie you tell yourself. You won’t. Add notes immediately, even if they’re brief. Context at save time takes 30 seconds. Trying to reconstruct context later takes 10 minutes or is impossible.
Optimizing for Initial Organization#
Stop trying to create the perfect system before you’ve saved anything. Start with good-enough organization and let it evolve based on how you actually use it.
Your research needs will change. Your organizational system should adapt, not be set in stone from day one.
When Your Research System Breaks Down#
Even good systems eventually accumulate cruft. Here’s how to revive one that’s gone off the rails:
The Quick Audit#
Spend 30 minutes browsing your research system and asking:
- What collections/tags am I not using?
- What’s duplicated?
- What’s outdated?
- What’s missing that I keep wishing I had?
This audit gives you a hit list of fixes that will make the biggest impact.
The Fresh Start Option#
Sometimes it’s easier to start fresh than fix a broken system. Export everything, create a new clean structure, and only migrate what you’re actually using.
Be ruthless. If you haven’t referenced something in six months and can’t imagine a scenario where you will, leave it in the archive.
The Gradual Migration#
If starting fresh is too extreme, create your new ideal structure alongside the old messy one. As you use things, move them to the new structure. After a few months, the old stuff is obviously unused and can be deleted.
This lets you evolve without disruption.
Making Research Organization a Habit#
Systems fail when they require willpower. Here’s how to make good research organization automatic:
Trigger: When you read something valuable
Action: Save it with a one-sentence note
Reward: Peace of mind knowing you can find it later
Start small. For one week, just focus on adding those one-sentence notes every time you save something. Don’t worry about perfect organization.
Next week, add another habit: spend 10 minutes Friday afternoon browsing what you saved that week.
Build the habit gradually until it’s second nature.
Your Research Deserves Better#
Here’s what I want you to take away from this:
Research organization isn’t about building the perfect system. It’s about building a system that works for how your brain actually functions and how you actually work.
Stop trying to force yourself into elaborate organizational schemes that require constant maintenance. Find something simple that matches your natural behavior and stick with it.
The measure of a good research system isn’t how organized it looks. It’s whether you can find things when you need them and whether you actually use what you’ve saved.
Your research represents hours of your time and attention. It’s valuable. Treat it like the asset it is by organizing it in a way that makes it accessible.
Start today. Pick one collection or theme you’re researching right now. Spend 30 minutes gathering everything you’ve saved about it into one place. Add context. Make it visual if you can. See how it feels to have one corner of your research actually organized.
Then do another. And another. Before you know it, you’ll have a research system that actually works instead of one that just stresses you out.
Stop drowning in information and start swimming through it with purpose. Your future self is counting on you.